


Not every warbird restoration focuses on a complete airframe. As much as we’d like to see them all saved, it just isn’t practical sadly. So very few of us are fortunate enough to have the space or the budget to preserve even one aircraft on our own. However, it is possible for an ordinary bloke on a shoestring budget to take on a cockpit section from a historic aircraft. In fact, preserving cockpit sections is becoming a popular pastime around the world. Where once an aircraft would be entirely scrapped, there are other options now. Some of the more common types can be had for just a few hundred dollars in bare bones condition, whereas a fully restored forward fuselage from a rare aircraft can command many thousands. We thought our readers would be interested to learn about the efforts of Australian David Rasmus and his fight to save the nose section of a WWII combat veteran Royal Australian Air Force Douglas Dakota. This aircraft rolled off the Douglas production line in Oklahoma as C-47A-25-DK 42-108949 in May, 1944 before joining the RAAF as A65-52 in June that year. She flew in support of Australian forces in the South Pacific during the war. After WWII, the Dakota entered the Australian civilian registry; first as VH-CII and later as VH-TAK. Our Antipodean correspondent, Phil Buckley brought us this story, for which we are very grateful! So here is David Rasmus in his own words…
MY BACKGROUND
I first became interested in WW aircraft when I was about 10 years of age. My Mother used to buy me a beautifully illustrated kids magazine from the UK called Lion and one of the stories was about a RAF ace called Paddy Payne who flew everything from Spitfires to Stirling bombers….the Germans never stood a chance. From then on I was hooked; every birthday or Xmas all I wanted was model aircraft… I had them everywhere in my room and hanging from the ceiling as well!
I joined the Gawler South Australia branch of the Air Training Corps as a cadet, and attained the rank of Corporal. On one of the visits to Edinburgh Air Base, our group received a flight on one of the RAAF C-47’s….my first flight ever. Little did I know where that would lead me later!
Life went on as normal and the fascination was always there, but I gained an interest in building cars, so I took to that passion for a while as I thought I could never afford an aircraft. But the turning point came in about 2009 when I started volunteer work at Classic Jets Fighter Museum in Parafield SA. When I started, we were finishing the P-39 and the boss was negotiating the purchase of a F4U-1 Corsair wreck from Vanuatu. I had never done sheet metal work before, but was always good with my hands and could pick up skills quite easily. After a short while, I was asked to build the Corsair’s vertical stabilizer from scratch using an original unit as a pattern. However, I wasn’t allowed to dismantle the authentic item; just measure and copy… The finished product earned me the “Crewmember of the Year” in 2010 as voted by the other workers, and I must say I was very proud of what I had achieved. From there forward, I took on anything I could, making every part starting with a flat piece of aluminium. I worked on Corsair bulkheads, wings, engine cowl and the last major parts were the air intakes, which are quite large and made up of a multitude of pieces.
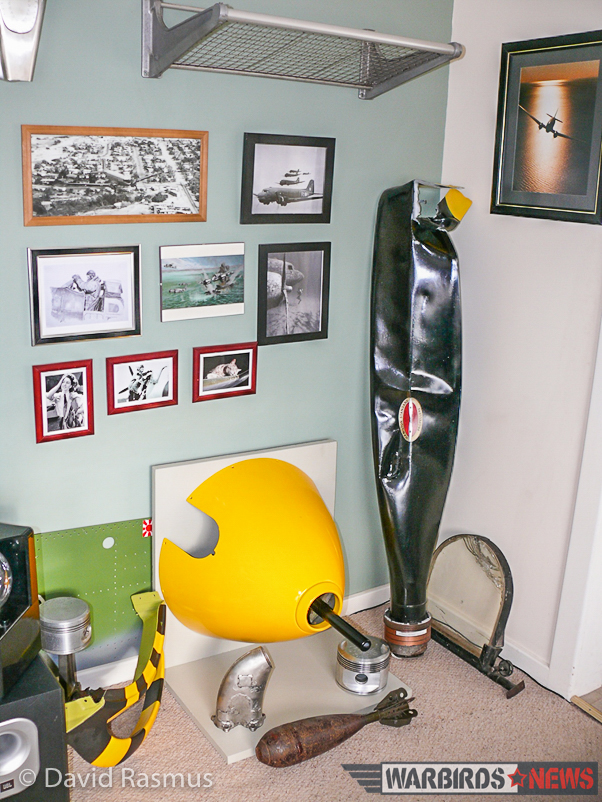
While working at the Classic Jets Fighter Museum, I acquired some pieces of wrecked warbirds from Bob Jarrett: a broken prop and spinner from a P-39, P-51 air intake and a piece cut from a P-39, plus a few other bits, which all came from New Guinea in the 1980’s. I spent time at home restoring or just cleaning them for display in my home, some of which are in the ‘Aircraft Corner’ of my lounge.

ACQUISITION OF C-47 COCKPIT
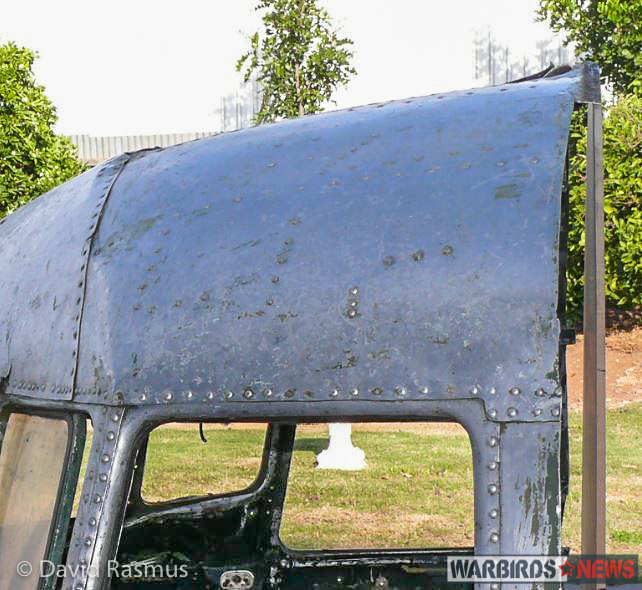
It was early 2014 when I saw an interview with Dick Winterburn of the Derelict Aircraft Museum in Victoria. He said he wanted to sell some of his wrecked aircraft, and as I was browsing the photo’s I saw it….There was this sad looking shell of a C-47 nose, cut off just aft of the pilot seats location, and right away I knew I wanted it. I emailed Dick the next day, and within a few days we had a deal. A friend of mine was driving interstate in May, so I joined him and we brought back my own small piece of C-47. I looked in to its history, and soon found out that it was a veteran of New Guinea and Borneo during WWII, serving with 34 and 38 Sqn RAAF…..I had myself a piece of Biscuit Bomber!!!! After the war, the Dakota was off for service as a civilian carrier in various companies. At the end of her flying career, she was used in a B grade movie called Sky Pirates in 1986. Unfortunately, this was when most of the damage was done to the aircraft. The film crew cut the fuselage down its length for interior shots, and after they were done shooting, someone hacked off the cockpit and scrapped the rest. It was a sad ending for a war veteran.
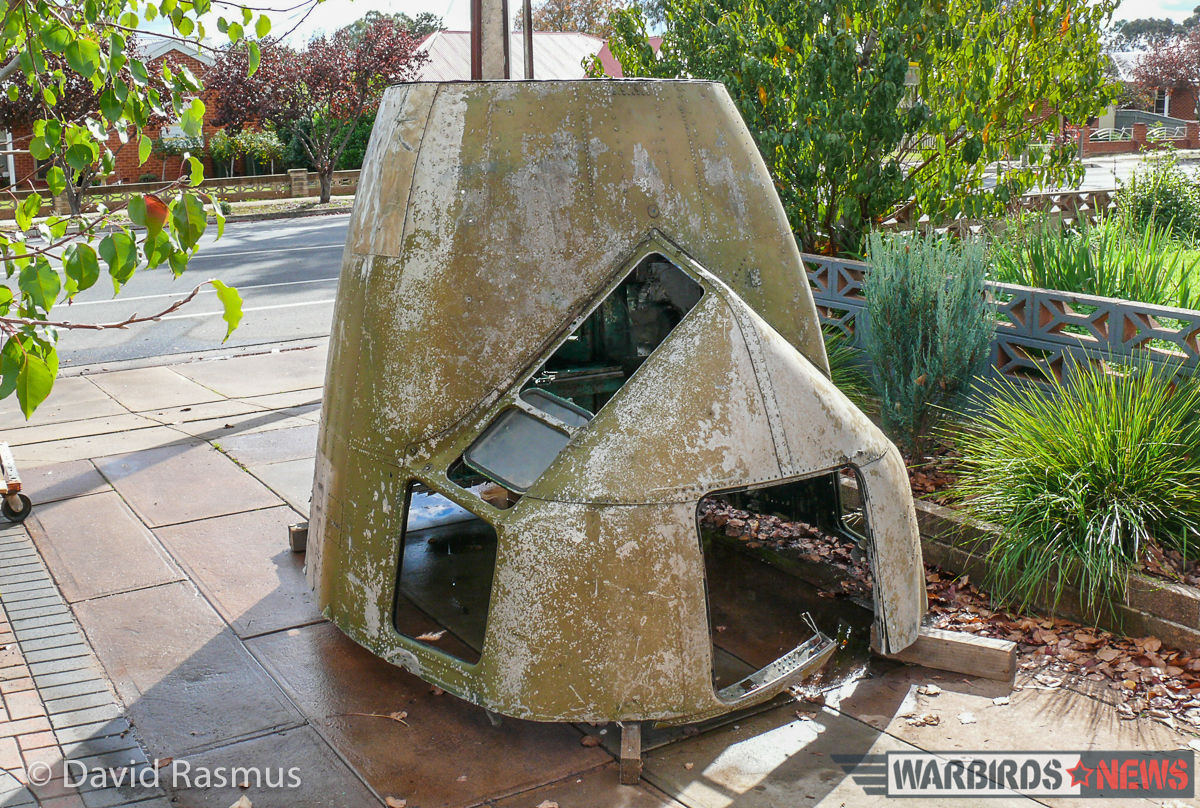
This nose section had to be restored…. I had to save it, no question about it.
PLANNING BEGINS TO OVERHAUL COCKPIT
So the planning began. The basics were easy; it will be a restoration to return the cockpit to its status while flying for the RAAF in 1944. So work started searching the globe for parts, making new friends and acquaintances. I found some parts in the USA and a small amount in Australia. Pretty soon I found out that most people with C-47 items didn’t want to part with them as they were so difficult to find. But I persevered, and kept asking questions, following leads, and even started my own Facebook page for the project. This is where help came from another C-47 devotee named David Anderson who has his own RAAF C-47 nose which he displays at air shows etc. David emailed me last year asking if I needed any parts, as he had been collecting for quite a while and it was time to move some on. I couldn’t get to the phone quick enough! He had a treasure trove of parts, and said he would like to see A65-52 as close to new status as possible. From what I’ve seen of his parts haul, I’m sure I’ll be pretty close. My second load will be coming over soon and will include both seats with cushions, escape hatch, hydraulic panels and tanks, windscreen wiper assembly and many more small parts. One of the hydraulic panels is actually from my very own aircraft as it still has the tag attached from when it was removed!
MAKING PROGRESS
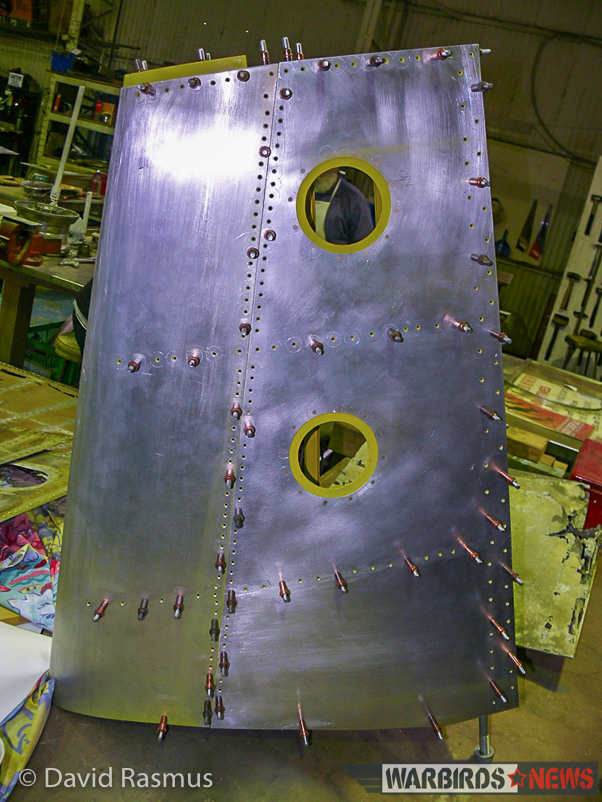
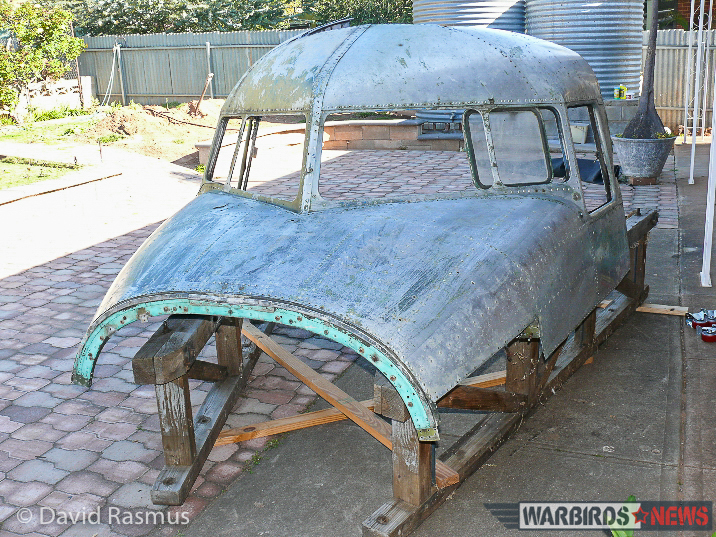
I’m doing all this work at my own home, and I must admit that my house got quite a few double takes with a Dakota nose perched in front of my kitchen window. I purchased a copy of a C-47 blueprint from e-Bay and had the station 86 section behind the pilot enlarged and transferred the shape on a large piece of MDF. Now I have a pattern of the actual size of the bulkhead and ribs I need to make. I have made some patterns and parts, which are all etch-primed and on racks ready for the assembly process to begin later.
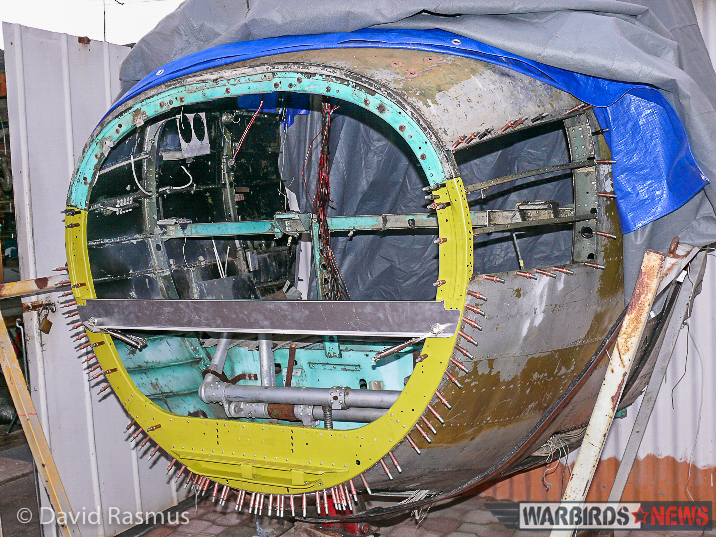
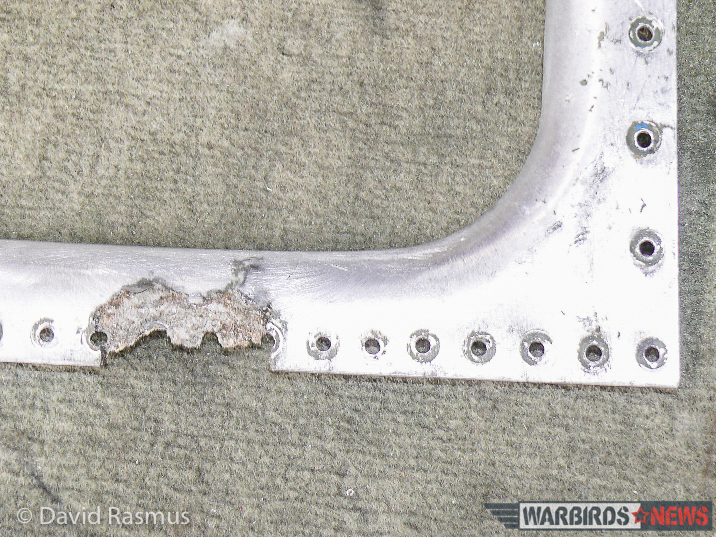
So I started the dismantling process. The first thing I had to do was patch the lower rib on the front of the nose to return some rigidity to the piece, then split the fuselage at the ‘waist’ just below the window frames, so now I have a top and a bottom.
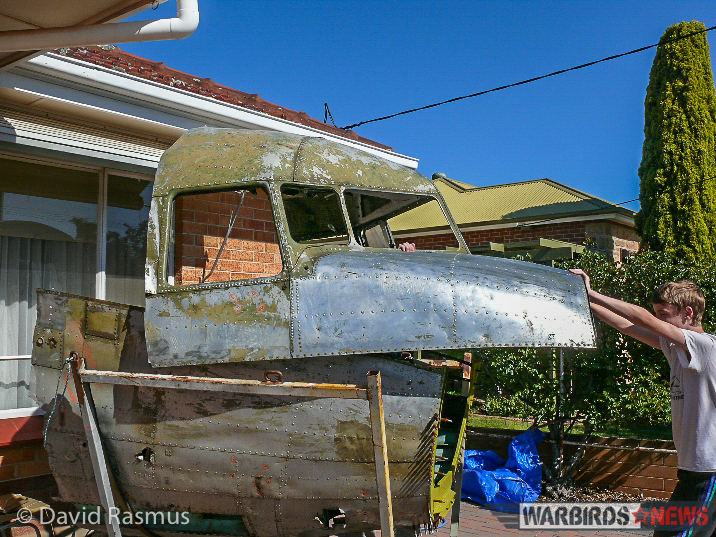
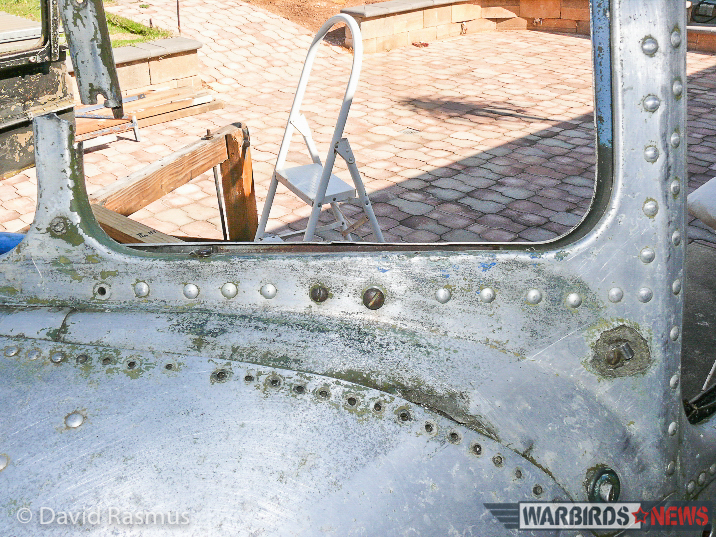
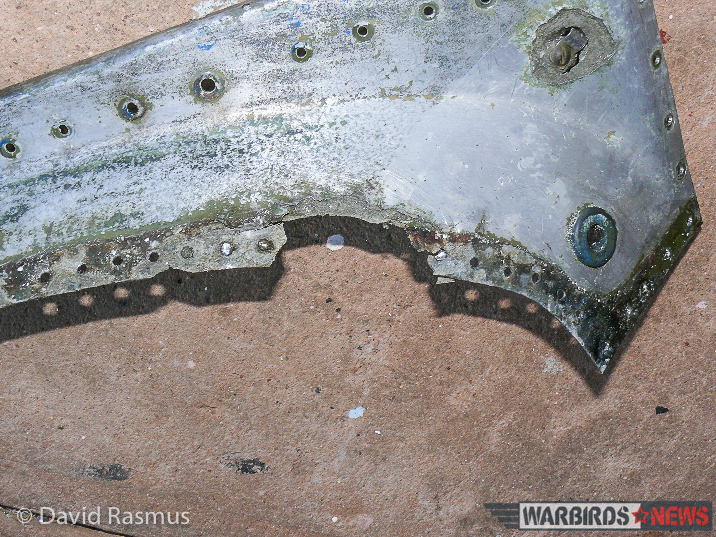
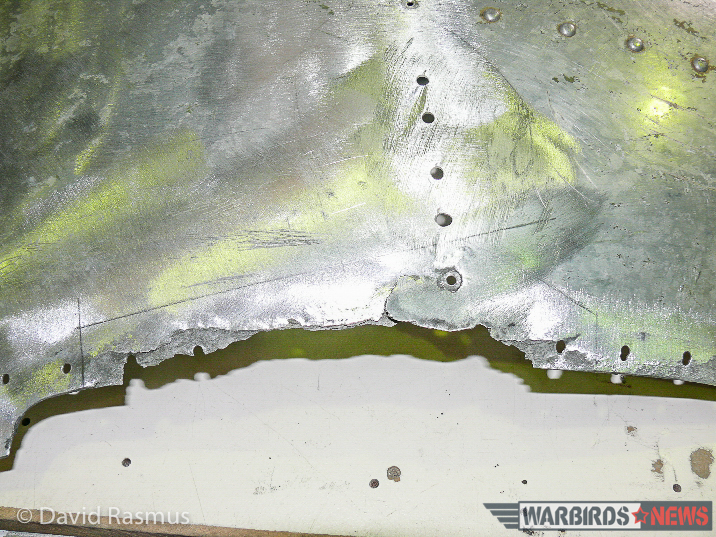
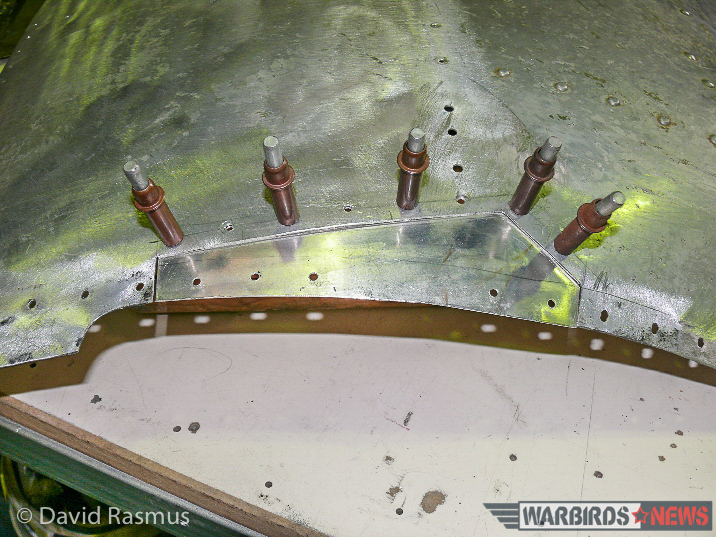
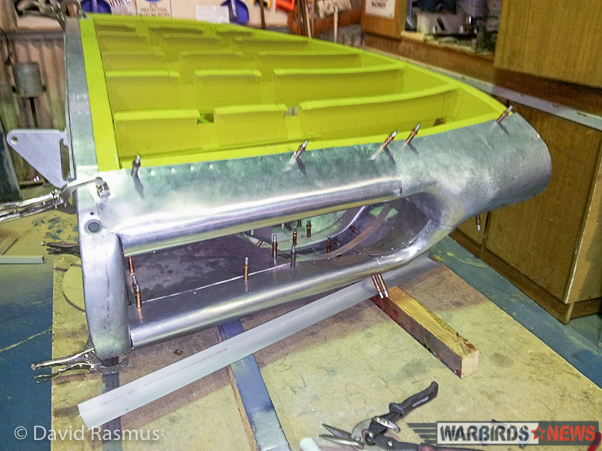
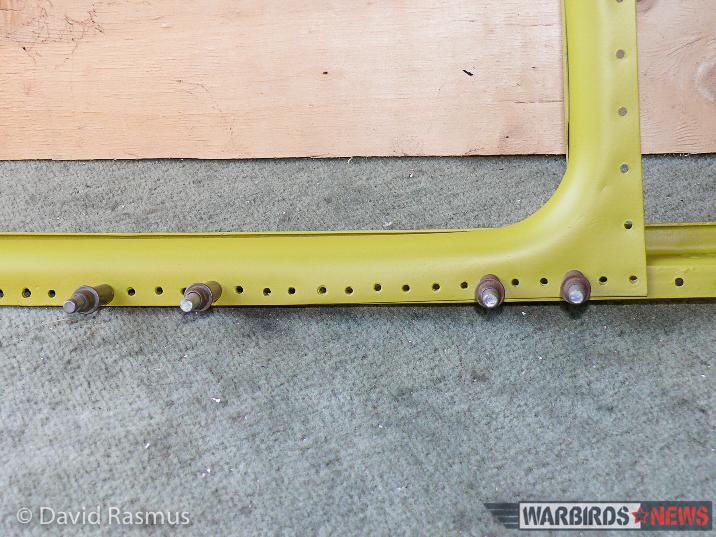
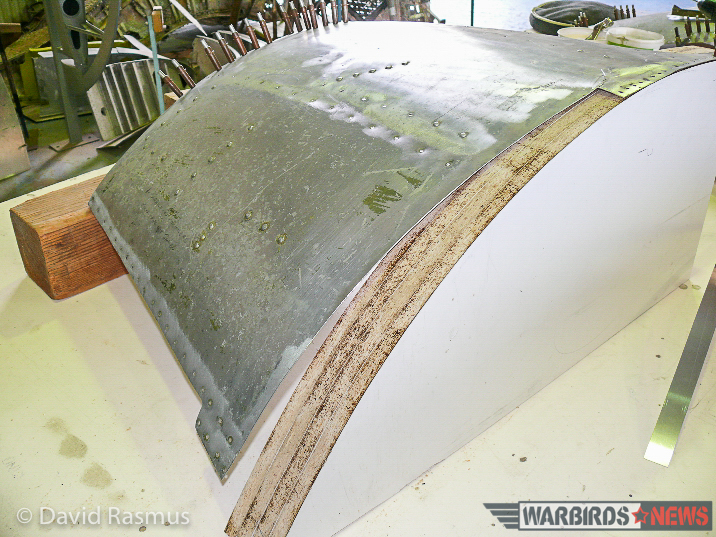
While the bottom was under cover, I started working on the top and found quite a bit of corrosion in some of the panels around the edges. I wanted to keep it as original as possible, so decided to patch all but the worst pieces (which will have to be re-made). Of course, the piece with the worst damage is also one of the more difficult parts to shape; the pilot’s side windscreen frame. Not to be put off, I dove in head first and after a few weeks of making the pattern then beating and shaping the aluminium, I ended up with a pretty good replacement part considering all I had to work with were hand tools (no expensive presses here). The roof panels required some re-shaping and patching, as did the centre ‘strap’ down the centre of both windscreens. The pilot’s side window frame needed a patch as well. All parts were etch primed and undercoated. I have already purchased the correct satin green paint for the interior and that will be applied once the last pieces have been repaired or replaced.
At the moment all that’s left on the jig is the panel in front of the pilots attached to 2 ribs. The next step is to clean and paint strip underneath, etch prime and undercoat. Only then can I start the assembly of the upper half….I can’t wait!

WarbirdsNews wishes to thank David Rasmus very much for his story, and we wish him well with his work on preserving Australian aviation history. It is clear that he has a passion for his work, and is making every effort to preserve as much original material as possible, which we always applaud. We will be following his project as it progresses. We also wish to thank Phil Buckley very much for his contributions too!

Terrific project. hope all goes well.