


As usual, WarbirdsNews has received the latest XP-82 Twin Mustang restoration update from Tom Reilly at his workshop in Douglas, Georgia. Here’s what they’ve been up to this month!
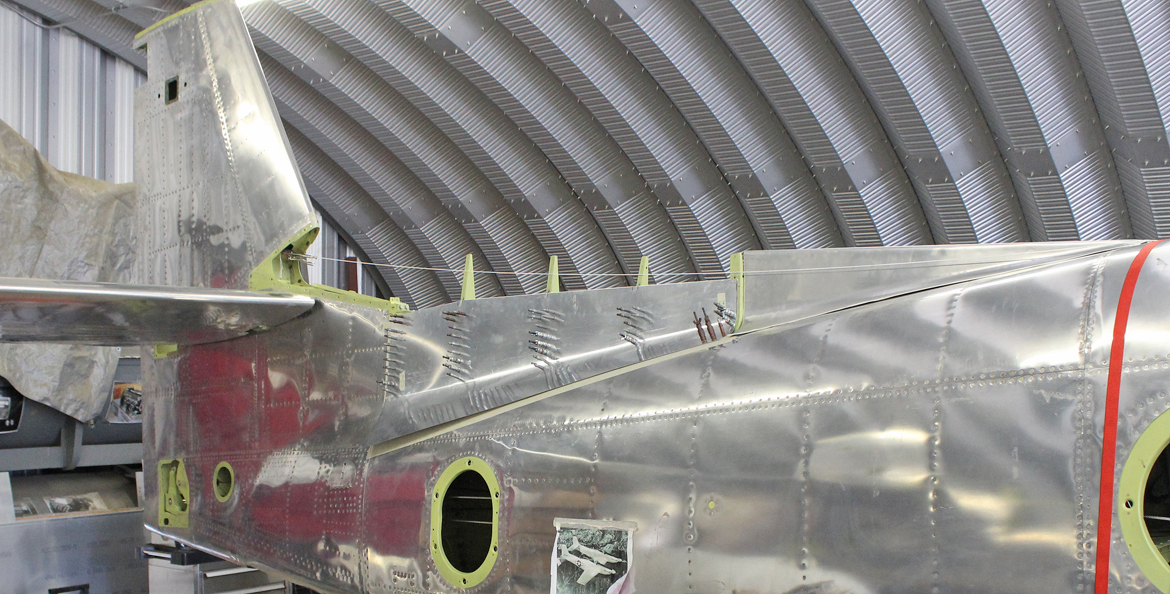
Aft Fuselages:
Part of the team has completed riveting all of the little hard-to-get-to places on both aft fuselages. They are now concentrating on completing both dorsal fins.
Systems
Excepting the completion of riveting work for the aft fuselages and dorsals, the remainder of the team has been working on finishing the multitude of systems and small-to-complete jobs.
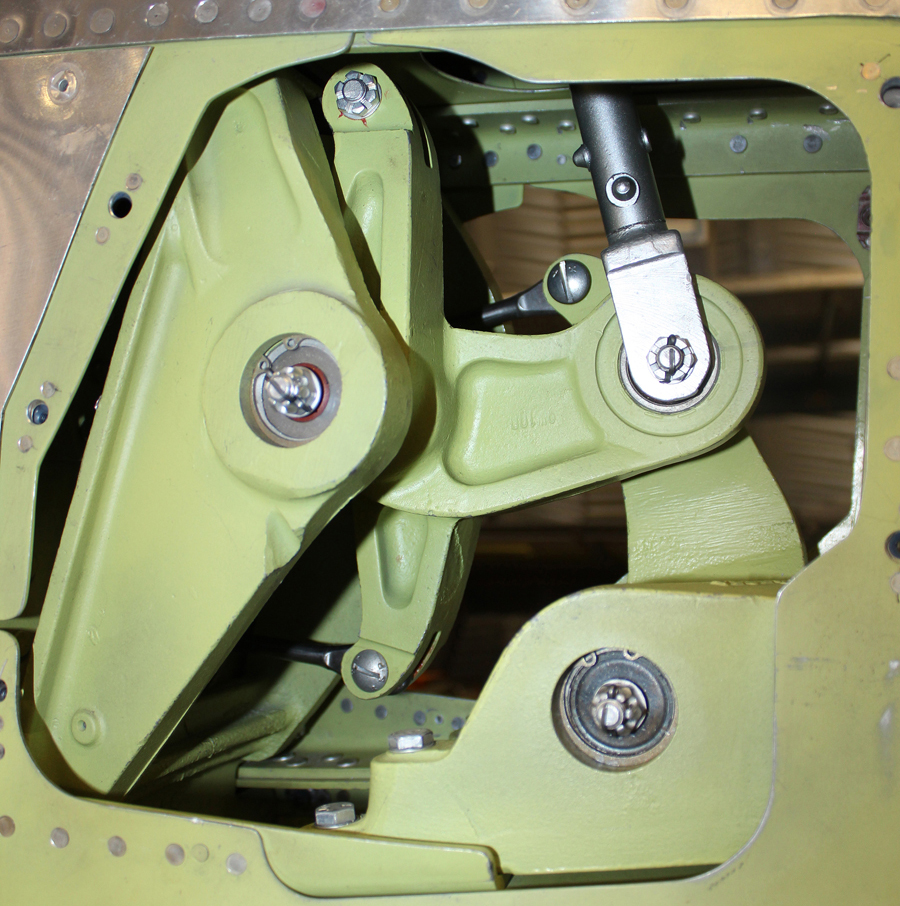
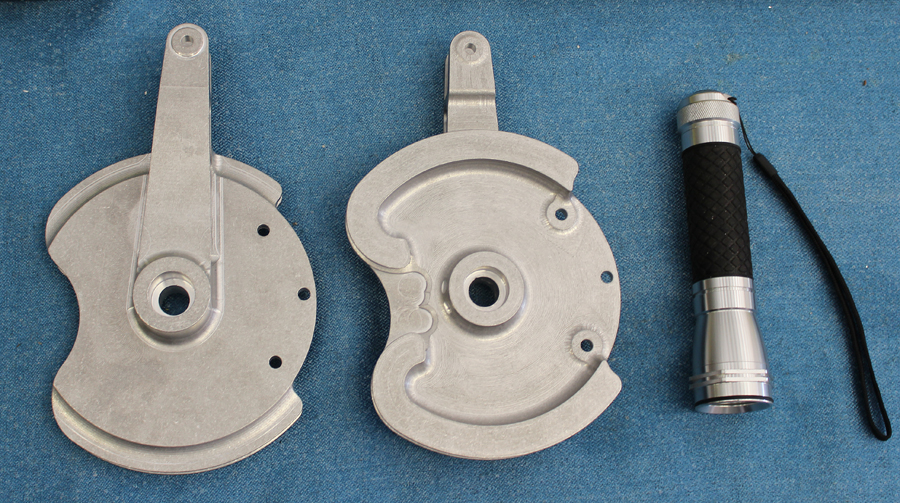
Center Section Gear Door Hooks
The up-lock mechanism for activating the gear door up-lock hooks is quite complicated with the amount of moving parts that it has, but very dependable. The mechanism is controlled by one hydraulic cylinder on each side mounted on the forward spar for the forward hook, and then transitioning all the movements through a number of bellcranks, push rods and levers to actuate each aft hook mounted on the center spar. Two team members have spent the entire month locating each casting (ten) that holds the bellcranks, etc. These bellcranks and mounts are all interwoven with the hydraulic lines and wiring harnesses. Pictures of the completed systems will be in next month’s update.
Emergency Up-Lock Releases
In the XP-82, and all subsequent models, there are landing gear up-lock emergency releases controlled by a pull handle, one in each cockpit, that will unlock the main and tail gear and allow the gear to free fall without hydraulic pressure to the down position and positive lock. These back-up safety factors are in place in the event of battle damage to the hydraulic system or the normal gear down actuation system.
There is an incredible number of pulleys in both wheel wells changing the direction of the cross-ship pull cables and releases. The NAA engineers who designed these complex gear door hook and emergency release systems deserve to take their hats off and take a bow.
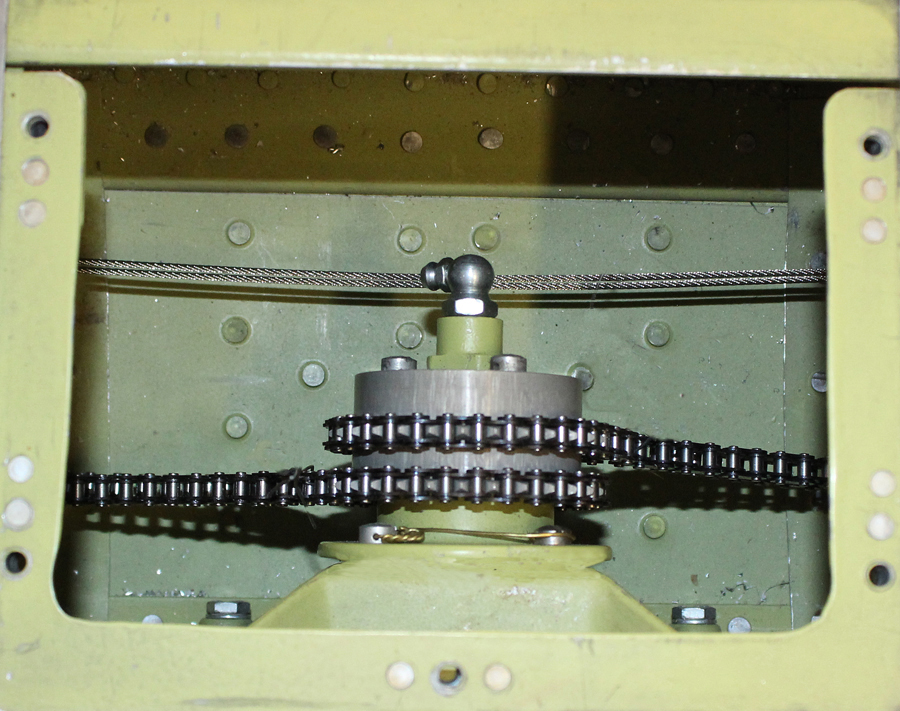
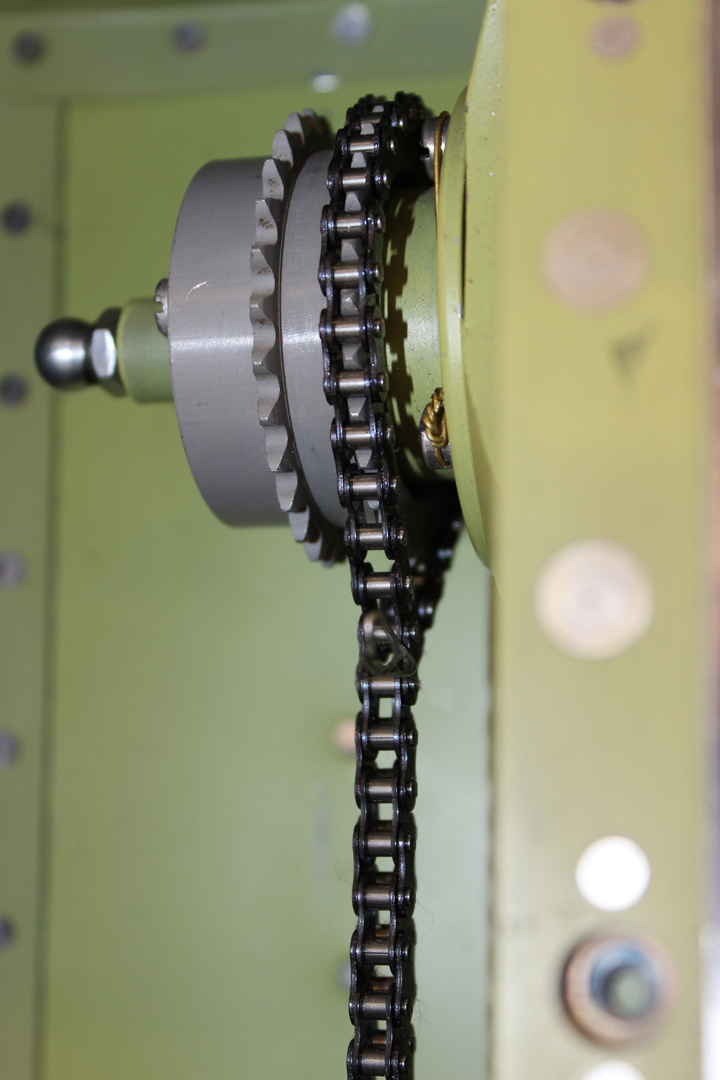
Control Cables
All of the primary and secondary flight control cables, chains, pulleys, bellcranks, push rods, etc., are now installed with the exception of the final completion of the trim and balance cables, which will be completed this coming week.
Rudder and Elevator Trim Tabs
The installation of the hinge blocks, new bearing mounts with new bearings, and three trim tabs is now completed. Finding the New Old Stock needle bearings for the bearing mounts has been a challenge, but Reilly thinks he has bought every last one that was available in the world. He replaced the magnesium needle-bearing mounts and machined new ones out of 7075-T6 aluminum, giving a much higher safety factor due to numerous known in-flight, trim tab failures.

Elevator
The team has completed the remaining items on the elevator, i.e., elevator control arms (two), counter weights, close-out panels and the final fitting of the elevator trim tab. The team has needed to add small counterbalance weights to the trim tab arms to offset the additional mass of the newly-manufactured trim tab fittings which Reilly had made from 7075-T6 Aluminum instead of the original, much lighter magnesium material.
Note: All aircraft control surfaces must be precisely balanced as per the factory data so that the control surfaces, i.e., rudder(s), elevator(s) and aileron(s), does not flutter in flight like a flag on a pole in a heavy wind. Inflight control surface flutter can be extremely dangerous. Thus the balance calculations must be perfect.
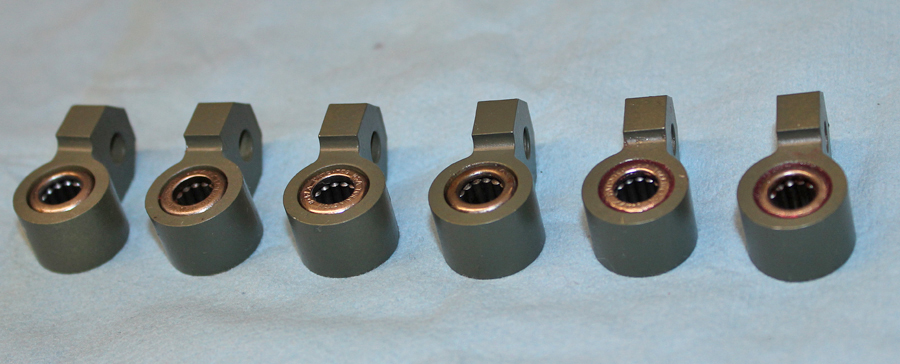
Aileron Hinge Points
The four specially machined aileron hinge points are nearing completion at one of the project’s sub-contract machine shops. These are the main hinge point attaching-and-actuating fittings that connect the ailerons to the wing trailing edges.
These fittings should arrive soon, and will be installed during December or January.
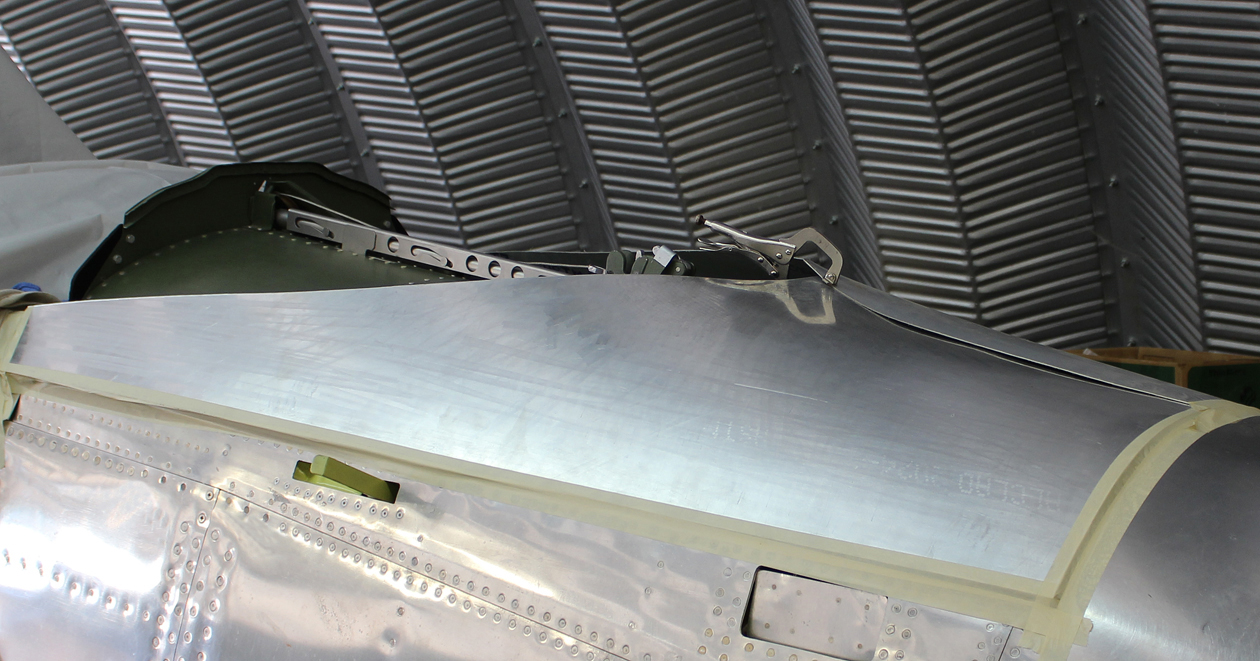
Canopies/Windshields/Aft Fairings
The team has made the final adjustments to both windshield bows so they match the mating canopy bows. The windshields both have their central glass panels permanently installed now, and are awaiting the delivery of the four side panels shipped from the contractor’s fabrication shop this past week. Final fitting of these side glasses will be finished by the end of December. A picture of the completed windshield assemblies will be in next month’s news release.
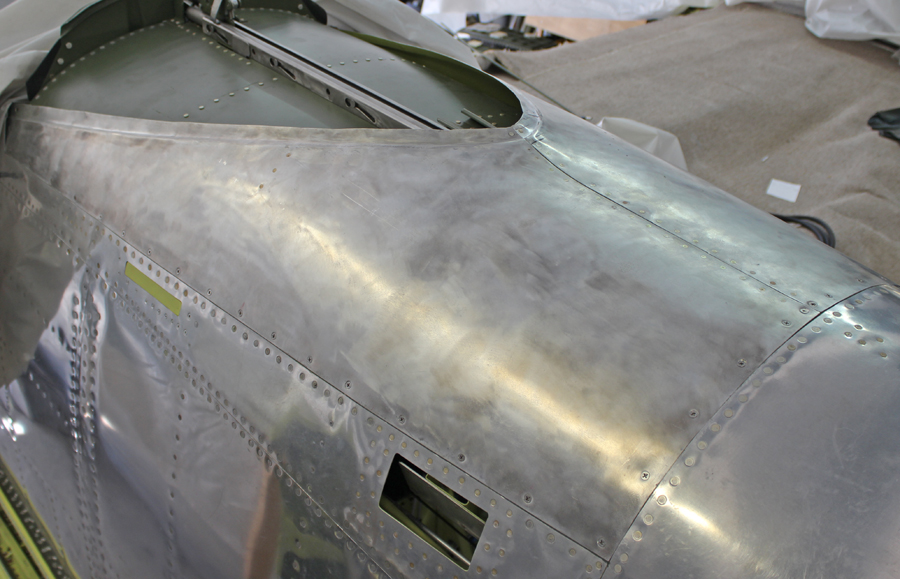
The aft canopy fuselage fairing located under the canopy is now completed for the lefthand fuselage, and the right-hand fuselage example is nearly done as well.
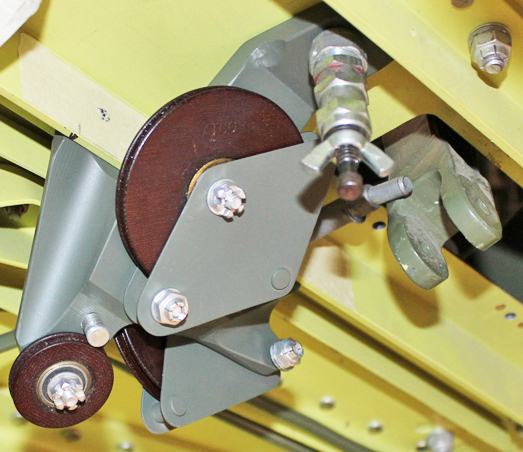
Brakes
The P-82 series has an incredibly complicated and unique braking system, making replacement parts nearly impossible to acquire. Reilly recovered one main brake caliper out of the Fairbanks scrapyard parts. It had been exposed to the weather for fifty plus years, and appeared to be in terrible shape. However, a couple of weeks ago, Reilly decided to take it apart to expose the internal hydraulic pistons just to look at their condition. To his surprise, all three of the caliper hydraulic cylinders and bores were in perfect re-buildable condition.
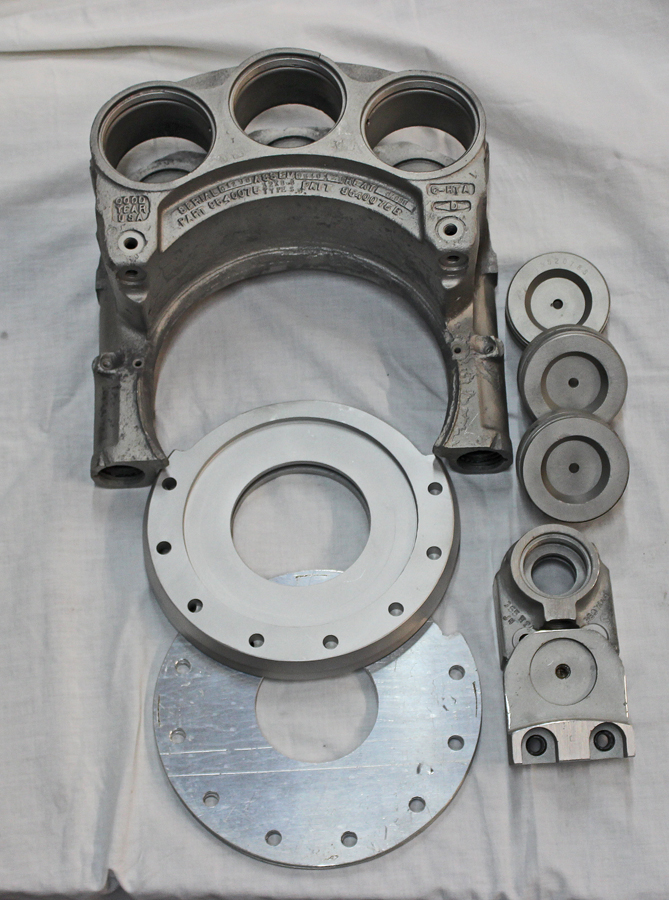
This leaves the project with only one caliper to come up with. Pat Harker has machined new ones for his F-82E in Anoka, Minnesota, and Reilly will talk to him about acquiring a newly manufactured one from his stock.
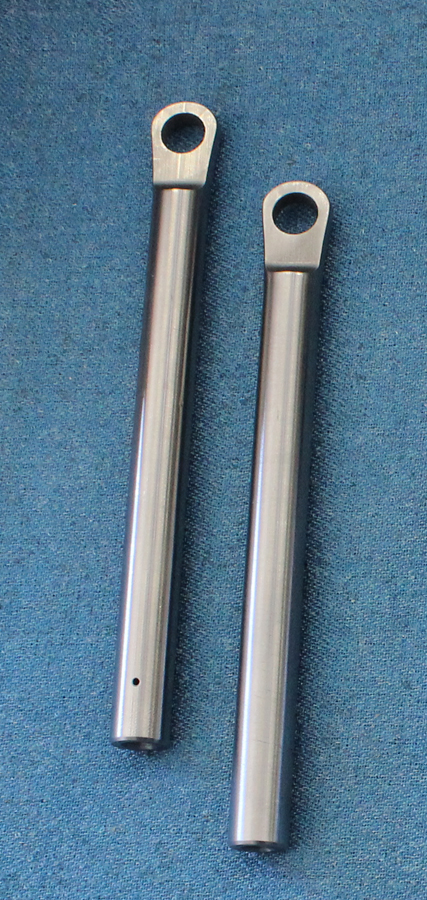
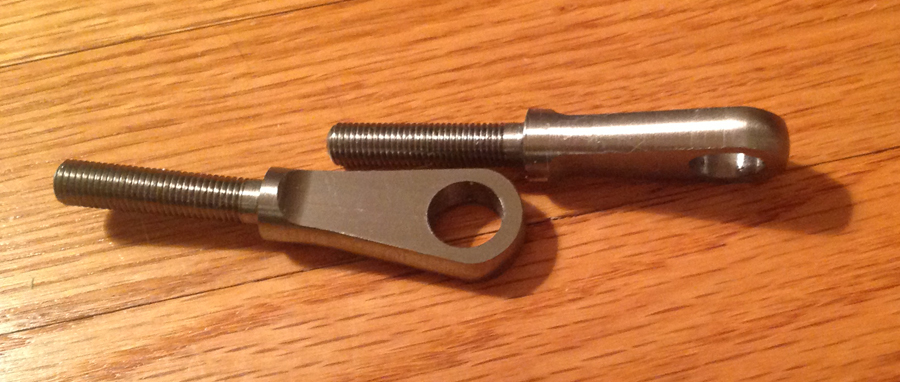
Additional Newly Manufactured Parts:
And that’s all for this month. Many thanks again to Tom Reilly for the update! You can learn more about the project on their blog HERE. Please be sure to check back with WarbirdsNews in early December for the next installation following the XP-82′s road to recovery!
Please click HERE for some of our previous updates.

This is great to see! I have seen 2 XP-82’s in my life. And it is such a unique aircraft that just explaining it to my friends that don’t know it exists is a treat to watch their facial expressions.
Nice work. That’s really going to drop some jaws when it runs down the runway for the first time and every time after that too. Wish you all the best.